


My mom’s birthday was last weekend, so I promised to make her some sort of breakfast. Unfortunately, we left early that morning for the Windy City, and that didn’t allow for time to actually make anything decent beyond “here, I poured you a birthday bowl of cereal!”. Thus it was decided we’d have a nice breakfast/brunch on the 4th of July when we’d all be home and not rushing about.
Baked oatmeal seems to be quite the thing nowadays, something I’ve never gotten around to making since all the members of my family are never in the house at breakfast time. Plus, I’m usually so impatient in the mornings to eat, any attempt at making something taking more than 10 minutes might send me into a grumpy-morning rage.


Anyways. Baked oatmeal is incredibly easy, especially if you’re using pre-cut/dried fruit, and incredibly versatile. And incredibly delicious. Still discernibly oatmeal, yes, but definitely different from instant or stove-top. It’s almost like a breakfast cake (real cake for breakfast is better, of course, but not every morning. A sugar crash during the middle of the work day would not be very profitable) – a little crunchy on the top, soft and warm in the middle.
Before this, I had no idea how you actually made baked oatmeal – clearly, putting something in the oven was involved, but beyond that, je ne savais pas. Upon finding a recipe, I really liked layering some fruit at the bottom, covering it with oats, and pouring the milk on top. I’m such a child – drizzling the milk was my favorite part.

Can you blame me?
Another funny thing: I had no idea what cutting apples “crosswise” meant, so I just sliced them up like that. Unfortunately, crosswise is a lot prettier than slicing.
This is a great dish for breakfast or brunch, and as previously mentioned, super versatile. If you don’t have (or want) strawberries, replace them with other fresh or frozen berries, bananas, other fruits, dried fruits. Any nut works well, too – I’m just partial to whole almonds, and walnuts are my mom’s favorite. Do yourself a favor and toast the nuts!
Wonderful warm from the oven and topped with more milk or yogurt.

I accidentally asked my mom if she wanted ice cream on hers.
(I meant yogurt, I swear.)
Apple Strawberry Nut Baked Oatmeal (printable recipe here!)
slightly adapted from Brown Eyed Baker (http://www.browneyedbaker.com/2013/01/03/apple-cinnamon-raisin-walnut-baked-oatmeal/)
[NOTE: to toast nuts, spread them evenly on a baking sheet covered in parchment paper. Bake in a 325 degree oven for 10-15 minutes, stirring at least twice, until nuts are brown and fragrant.]
Ingredients
Directions

Confession: I’ve never been a fan of strawberry shortcake, which is probably akin to saying I hate America or summertime or butterflies. I mean, for whatever reason, the strawberries always taste more like fake syrup than real fruit. My biggest issue is the tasteless cake’s texture – every shortcake I’ve ever eaten has been incredibly dry, and even when it’s soaked and soggy from the infiltrating strawberry juice, it still seems to be devoid of any flavor or pleasantries.
Whew. Feels good to get that off my chest.
Another confession, or perhaps merely a deprivation due to the sin of my parents: I’ve never eaten fresh strawberries before. I’ve had pounds of fresh vegetables, and I’ve eaten raspberries and blackberries fresh off the bushes in front of a friend’s house, but…never fresh strawberries. Riding in the backseat as we drove through the country when I was a kid, my mouth watered whenever we passed a pick-your-own-berries path or fresh berry stand. Yet for all the desires in my childish heart, I never summoned up enough courage to ask my parents if we could go berry picking out of fear of being shot down.

And that, my friends, brings us to this week, when my mother came home after a day with her sister, bearing strawberries that her previously mentioned sister (aka my aunt) had gotten that day. And holy. Cow. I will never look at store-bought strawberries the same again. So juicy, so flavorful! Gah! Maybe I’ll plant some. (Uh, on second thought. No, I don’t have time for that.)
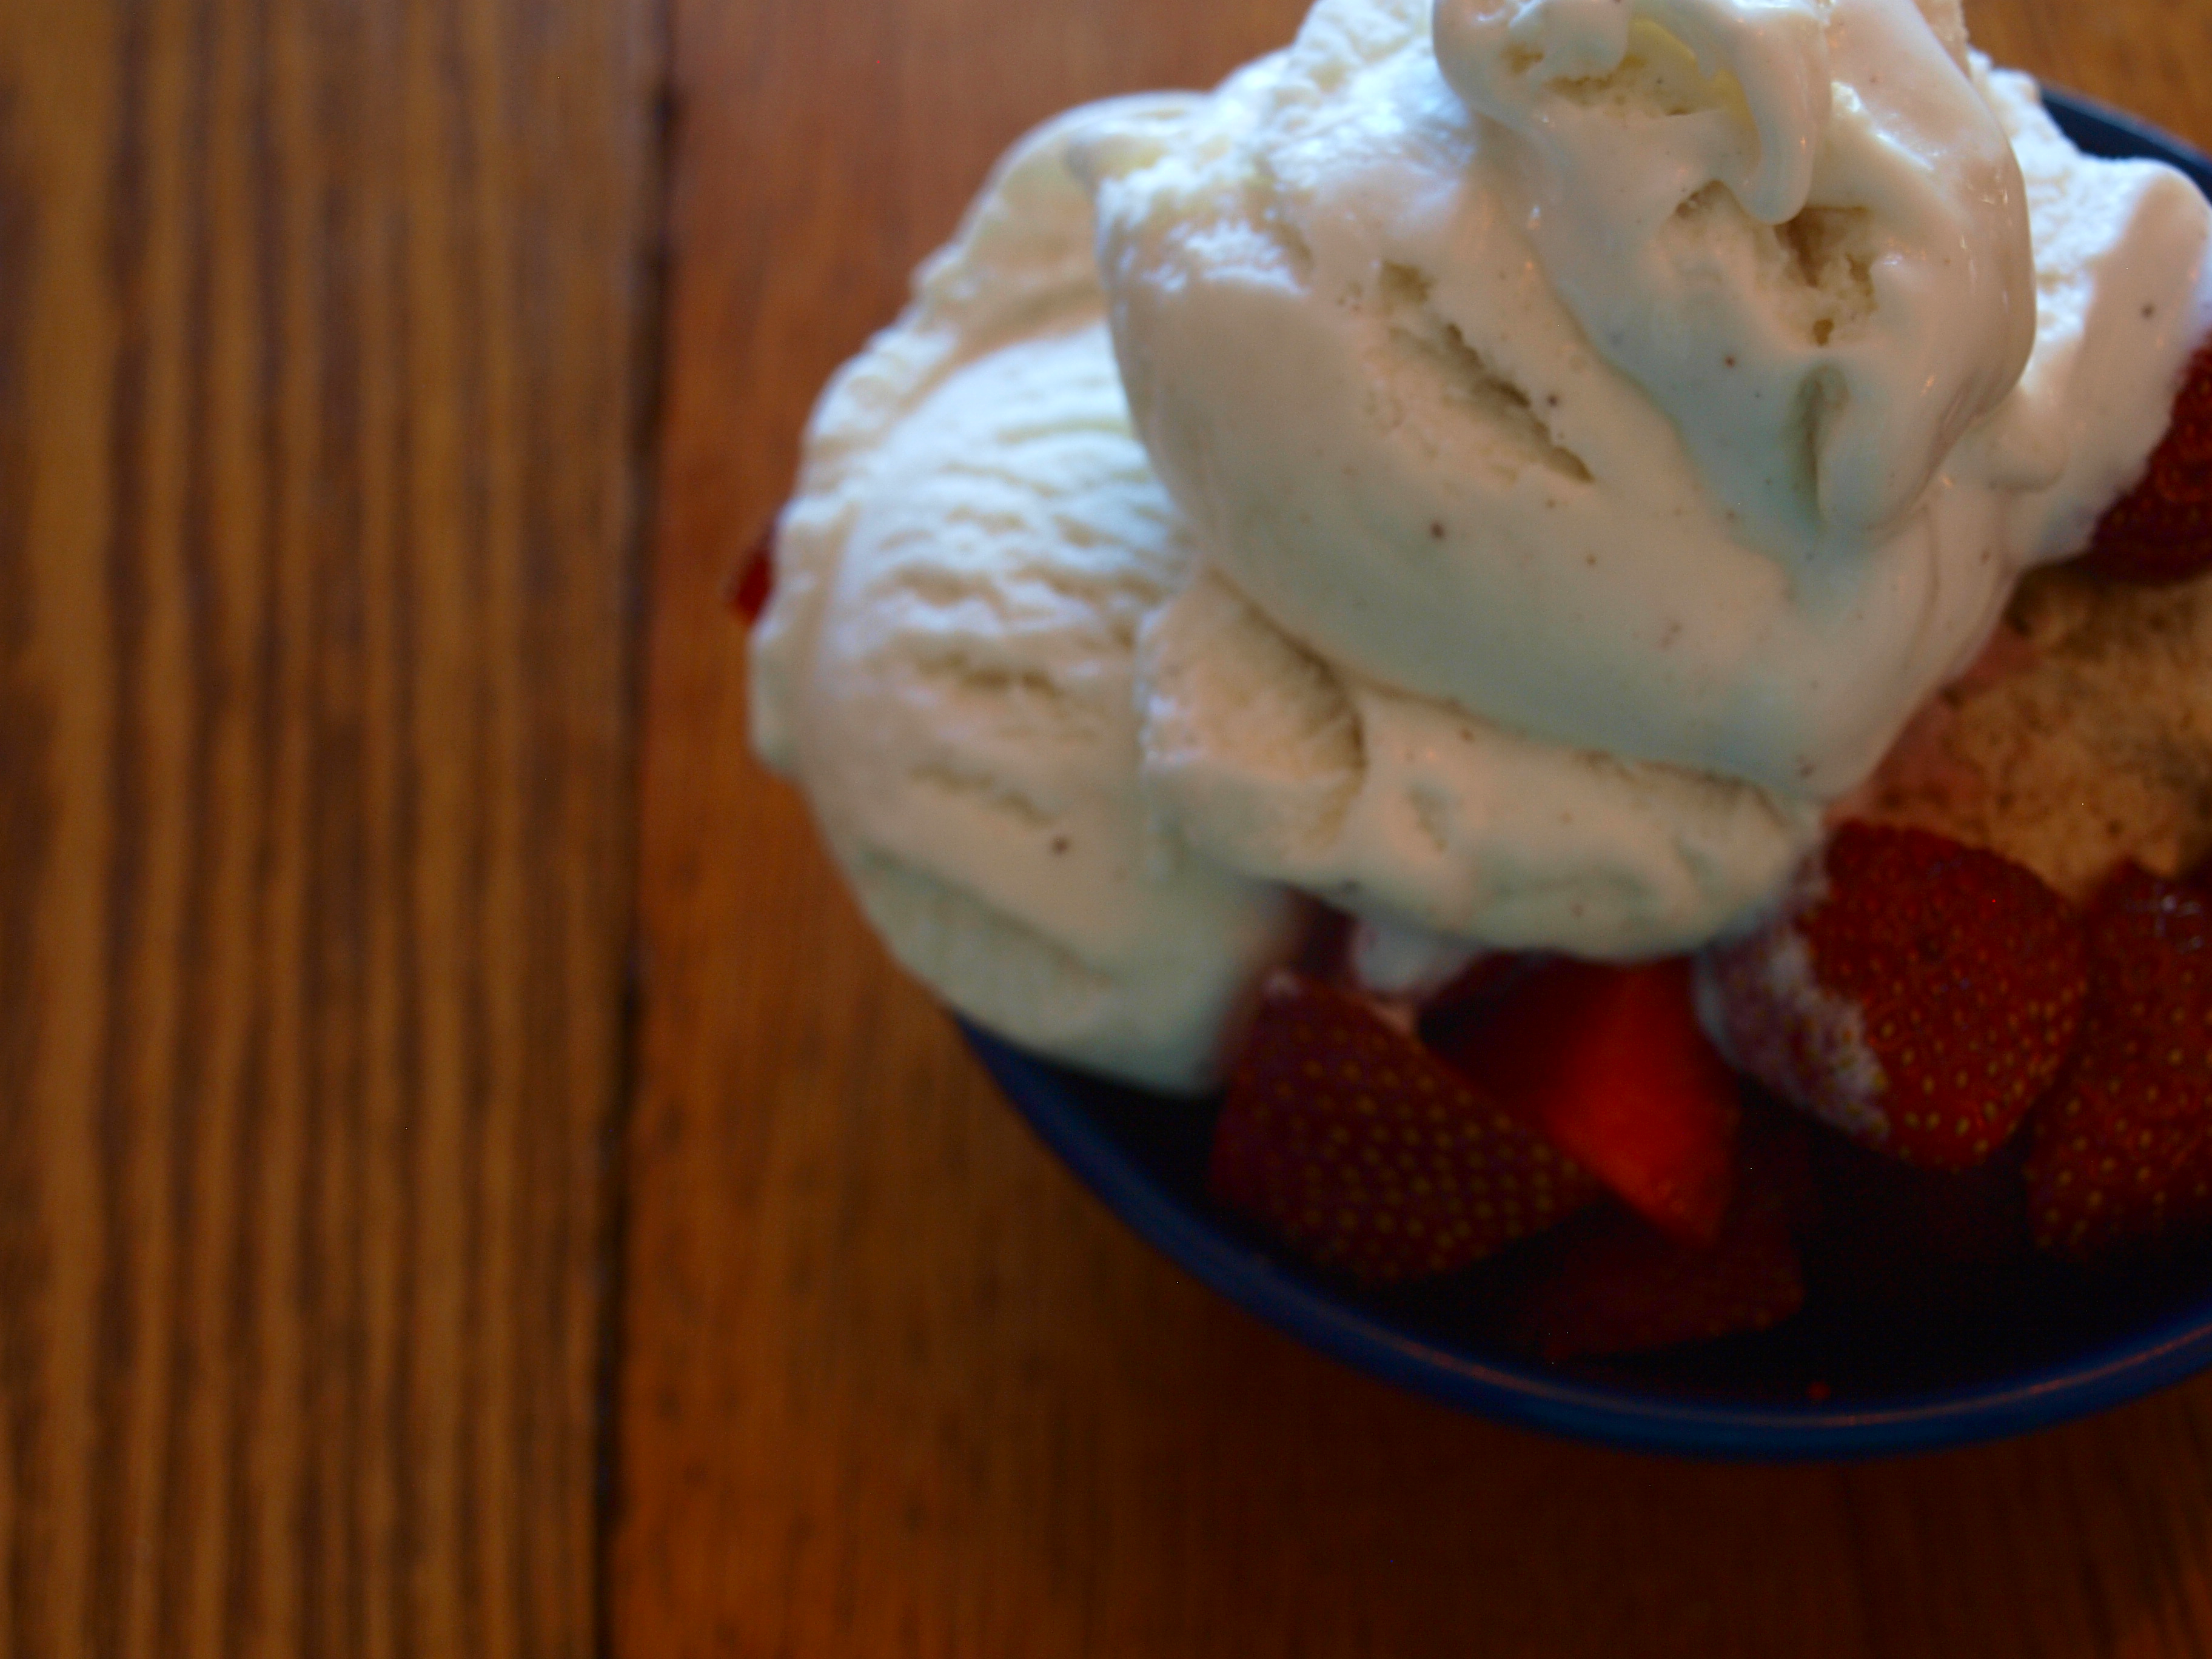
The arrival of fresh strawberries meant only one thing to my father: strawberry shortcake. Desperate to bake something after a long day folding boxes at work, I happily obliged, although he complained that they wouldn’t be made out of Bisquick (the horror!). Along with the strawberries, my aunt had also given me a bag full of cookbooks; conveniently, I found a strawberry biscuit shortcake recipe in one of them and got right to work. On a whim, I threw in a dash of cinnamon and added more flour because what was supposed to be a mound looked a bit like a ball of wet flour. Drop drop drop on the baking pan…and 14 minutes later, they were ready to go.

Typical strawberry shortcake dealio: dish, biscuit, strawberries, biscuit, strawberries, whipped cream. Unfortunately, we seemed to be lacking in whipped cream so I substituted vanilla ice bean ice cream (I’m un-American even when I’m trying to be American…ugh). Having two enormous shortcake biscuits left after making an enormous mound for my father, I decided to make a smaller one for myself just out of curiosity.. Dish spoon mouth – and oh man, one bite cured me of my strawberry shortcake aversion. The biscuit was crunchy on the sides and very top, incredibly soft and flavorful. It tasted like something, something good – slightly sweet with a bit of cinnamon kick. Not cardboard, but fluffy, a cross between cake and an abnormally delicious sugar cookie, the perfect seat for a tumble of strawberries and an obscene amount of whipped cream.

It didn’t take long for my father to come to the same (loud) conclusion. No Bisquick shortcakes in this house.
It’s officially the weekend, and you deserve an easy, delicious bowl of sweet happiness. Go ahead.
Strawberry Biscuit Shortcake
adapted from The Best of Country Cooking 1999
(Note: this is a small recipe that can easily be doubled or even halved if desired. Only use a dash of cinnamon! The number of shortcakes will vary with how big you make the mounds.)
Ingredients
Directions

CAKEY’S NOTE: Hi! We’re taking a break from our normally scheduled programming from the world of my kitchen and brain and giving you, with great pleasure, Cakey Bakes’ first-ever guest post, brought to you by my dear friend & partner-in-crime Kathryn, & I wouldn’t have anyone else for our first guest post. I happen to be horrendously jealous of her (don’t tell her!) art, writing, fashion, and sweet-talking skills, not to mention her dedication to everything she endeavors upon. She’s been a huge encouragement to me when it comes to blog matters as well as real-life stuff, and she’s let me use her iPhone to take pictures countless times. She is smart, clever, and all-around fabulous in every sense of the word. Oh, and she knows how to spell “pomegranate”, unlike yours truly. So without any further ado…

Kathryn: I’d like to consider myself a balanced health-freak.
Which means I work out for an hour and a half a day, eat organic and whole foods (no gluten here), and feed my cat non-chemical-doused food. I do yoga, peruse healthy-cooking blogs, volunteer at the local environmental outreach and Humane Society – if you’re looking for “organic”, here I am…or as granola as a girl who likes designer fashion and jazz can get.
Uh, yes, I’ll take “break-in at Tiffany’s” for 100, please?

But where’s the balance, you ask? In these cookies.
These decadent, delicious, sexy cookies provide the balance.
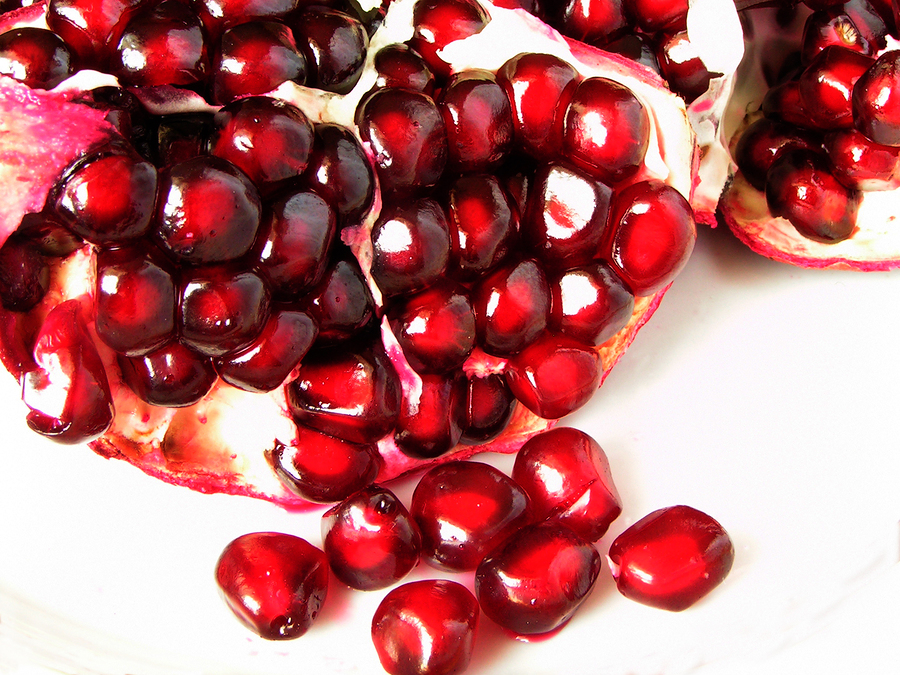
There is nothing even remotely healthy about these treats, which is why I love them so much. Smooth cocoa and rich dark chocolate combined with the dash of salt create a surprisingly soft, gooey center. And the pomegranate arils? Perfection. A little burst of tangy-sweet in every bite. Don’t be intimidated by the pomegranate, please! She may look dangerous, but trust me. You can handle her.

Horribly, irrevocably seduced yet?
Good.

Chocolate Fudge Pomegranate Cookies (recipe from How Sweet Eats)
Ingredients:
1 cup butter (melted)
1 1/2 cups sugar
2 eggs
1 1/2 teaspoon vanilla
2 cups flour
1/2 cup cocoa powder
1 teaspoon baking soda
1/8 teaspoon salt
2 tablespoons pomegranate juice
1 cup chocolate chips
1/3 cup pomegranate arils
(*alternatives: replace half the butter with coconut oil, switch out a lower-fat/whatever margarine for the butter, use whole-wheat OR oat flour. You can also replace up to 1/3 of the flour with almond flour, for those of us who can’t have gluten.
Dark chocolate is healthy for you. Don’t replace that sucker with anything. Shut up and enjoy it.)
Directions:
1. Cream together the melted butter, sugar, eggs and vanilla until fluffy.
2. Add the flour, cocoa powder, baking soda and salt.
3. Add pomegranate juice and mix until combined.
3. Fold in chocolate chips and arils. Refrigerate dough for 2-4 hours (or less/more)**.
4. When ready to bake, preheat oven to 350, roll the dough into balls and set on baking sheet.
**I made a batch without refrigerating and they turned out fine. They were actually softer without the chill, so…take that advice as you may.
Tip: freeze any leftover dough for slice-and-bake chocolate fudge pomeganate cookies up to two weeks later!

Pair with milk, a good book, and enjoy the decadence, lovelies.

[Yes, yes, I’m a week late, I know. Job hunting has been excruciating, not to mention the massive amount of house cleaning, preparations for a garage sale, and less-than-stellar internet connection.]
Every mother has a favorite dessert – blueberry pie, lemon cake, walnut brownies, strawberry mousse. My mother’s just happens to be cheesecake.
Even though she is a self-professed chocoholic, one bite of chocolate cake will cause her to sit back in her chair, smack her lips, and proclaim, “Too rich!” Usually, she can’t make it through a whole brownie because it overwhelms her.
But all that is put aside when she is given cheesecake.
Since my childhood, I’ve witnessed my mom crushing graham cracker crumbs, beating sugar and cream cheese, carefully scraping the batter into a fancy pan, and bake for hours. The waiting was always agony and I was usually sentenced to tip-toeing around the house in case I accidentally managed to upset the baking cheesecake. Oftentimes I wouldn’t even get to try the finished product because she’d take it to a get-together with her friends or some grown-up party.
Then again, she usually didn’t get to try it, either.

Being away from my mom all year was difficult, so I wanted to make sure I did something extra special for Mother’s Day. What do you get for the mom who already has everything, whose taste in jewelry is far beyond your price range, whose husband groans whenever she receives another sentimental “knick-knack”, and who insists she wants nothing for Mother’s Day except the presence of you and your father?
Cheesecake.

I’ll spare you from the boring details and enthusiasm received when this was set on the table. All you need to know is that this recipe is delicious. You make the curd, you make the cheesecake, let it cool and refrigerate. It’s important, though, to refrigerate it overnight!
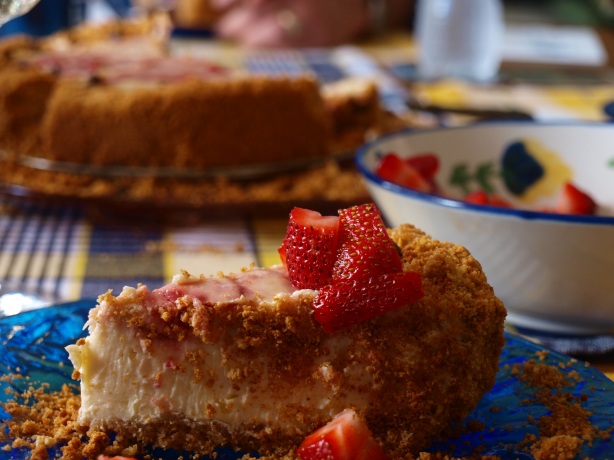
Don’t be intimidated by the curd, either. It’s basically a thick jam. You could even double the curd recipe if you want your cheesecake extra strawberry-y…which is what I’ll do next time. I tweaked the original recipe a little bit, using fewer graham cracker crumbs because the crust ended up being higher than the actual cheesecake and far too crumbly. Fortunately, my family cares more about taste than presentation and the crumbs were generously sprinkled over the slices.

Best when topped with fresh strawberries.
And love.
Strawberry Swirl Cheesecake
from Chocolate Moosey
Ingredients
For the strawberry curd
For the cheesecake
Directions
Baking and blogging during midterms?

Challenge accepted.
One of the food staples among my friends and me here at school is bananas, one of the few fresh fruits our cafeteria offers. At one point last week, however, we realized that we had an excess of quickly ripening bananas in our dorm rooms. Of course, the logical conclusion we reached was to bake banana bread.
So, Sunday morning, we stole into one of the other dorms – one with a well-equipped, clean, roomy kitchen.

Remember Kathryn from my last post? She is a self-professed “I do not particularly enjoy baking” woman.
This recipe converted her.

What happens when you have a lot of bananas, a 26-oz jar of peanut butter, and two bags of chocolate chips?
Miracles happen, my friends. Delicious, warm, gooey miracles.
As you probably already know, proper baking things are often in short supply in college. Since there wasn’t a loaf pan in sight, I opted for a muffin tin, then decided on a round cake pan. Ok, maybe it was a metal pie pan. Honestly, at this point, it’s a miracle I know where my dorm is and how to tie my shoes. Whatever. That being said, I was a little anxious about it would turn out.

Of course, there was another snafu: no eggs, despite a desperate wild goose chase to procure a few by raiding three dorm kitchens . Not a one. Not even egg substitute. According to someone on Google, however, apparently you can use applesauce and baking powder as an egg in a pinch. Number two on the list of potentially disastrous things in this recipe.
A third “disaster”? Some of the bananas weren’t as ripe as anticipated…banana bread is only as good as its bananas. Again, thanks to Google, that was quickly remedied by throwing the bananas in the hot oven as we mixed all the ingredients. (for the full tip on ripening bananas, see the very bottom note of this post)
So, with great apprehension, Kathryn & I measured, poured, and mixed (in REAL bowls, with REAL spoons and a REAL whisk).
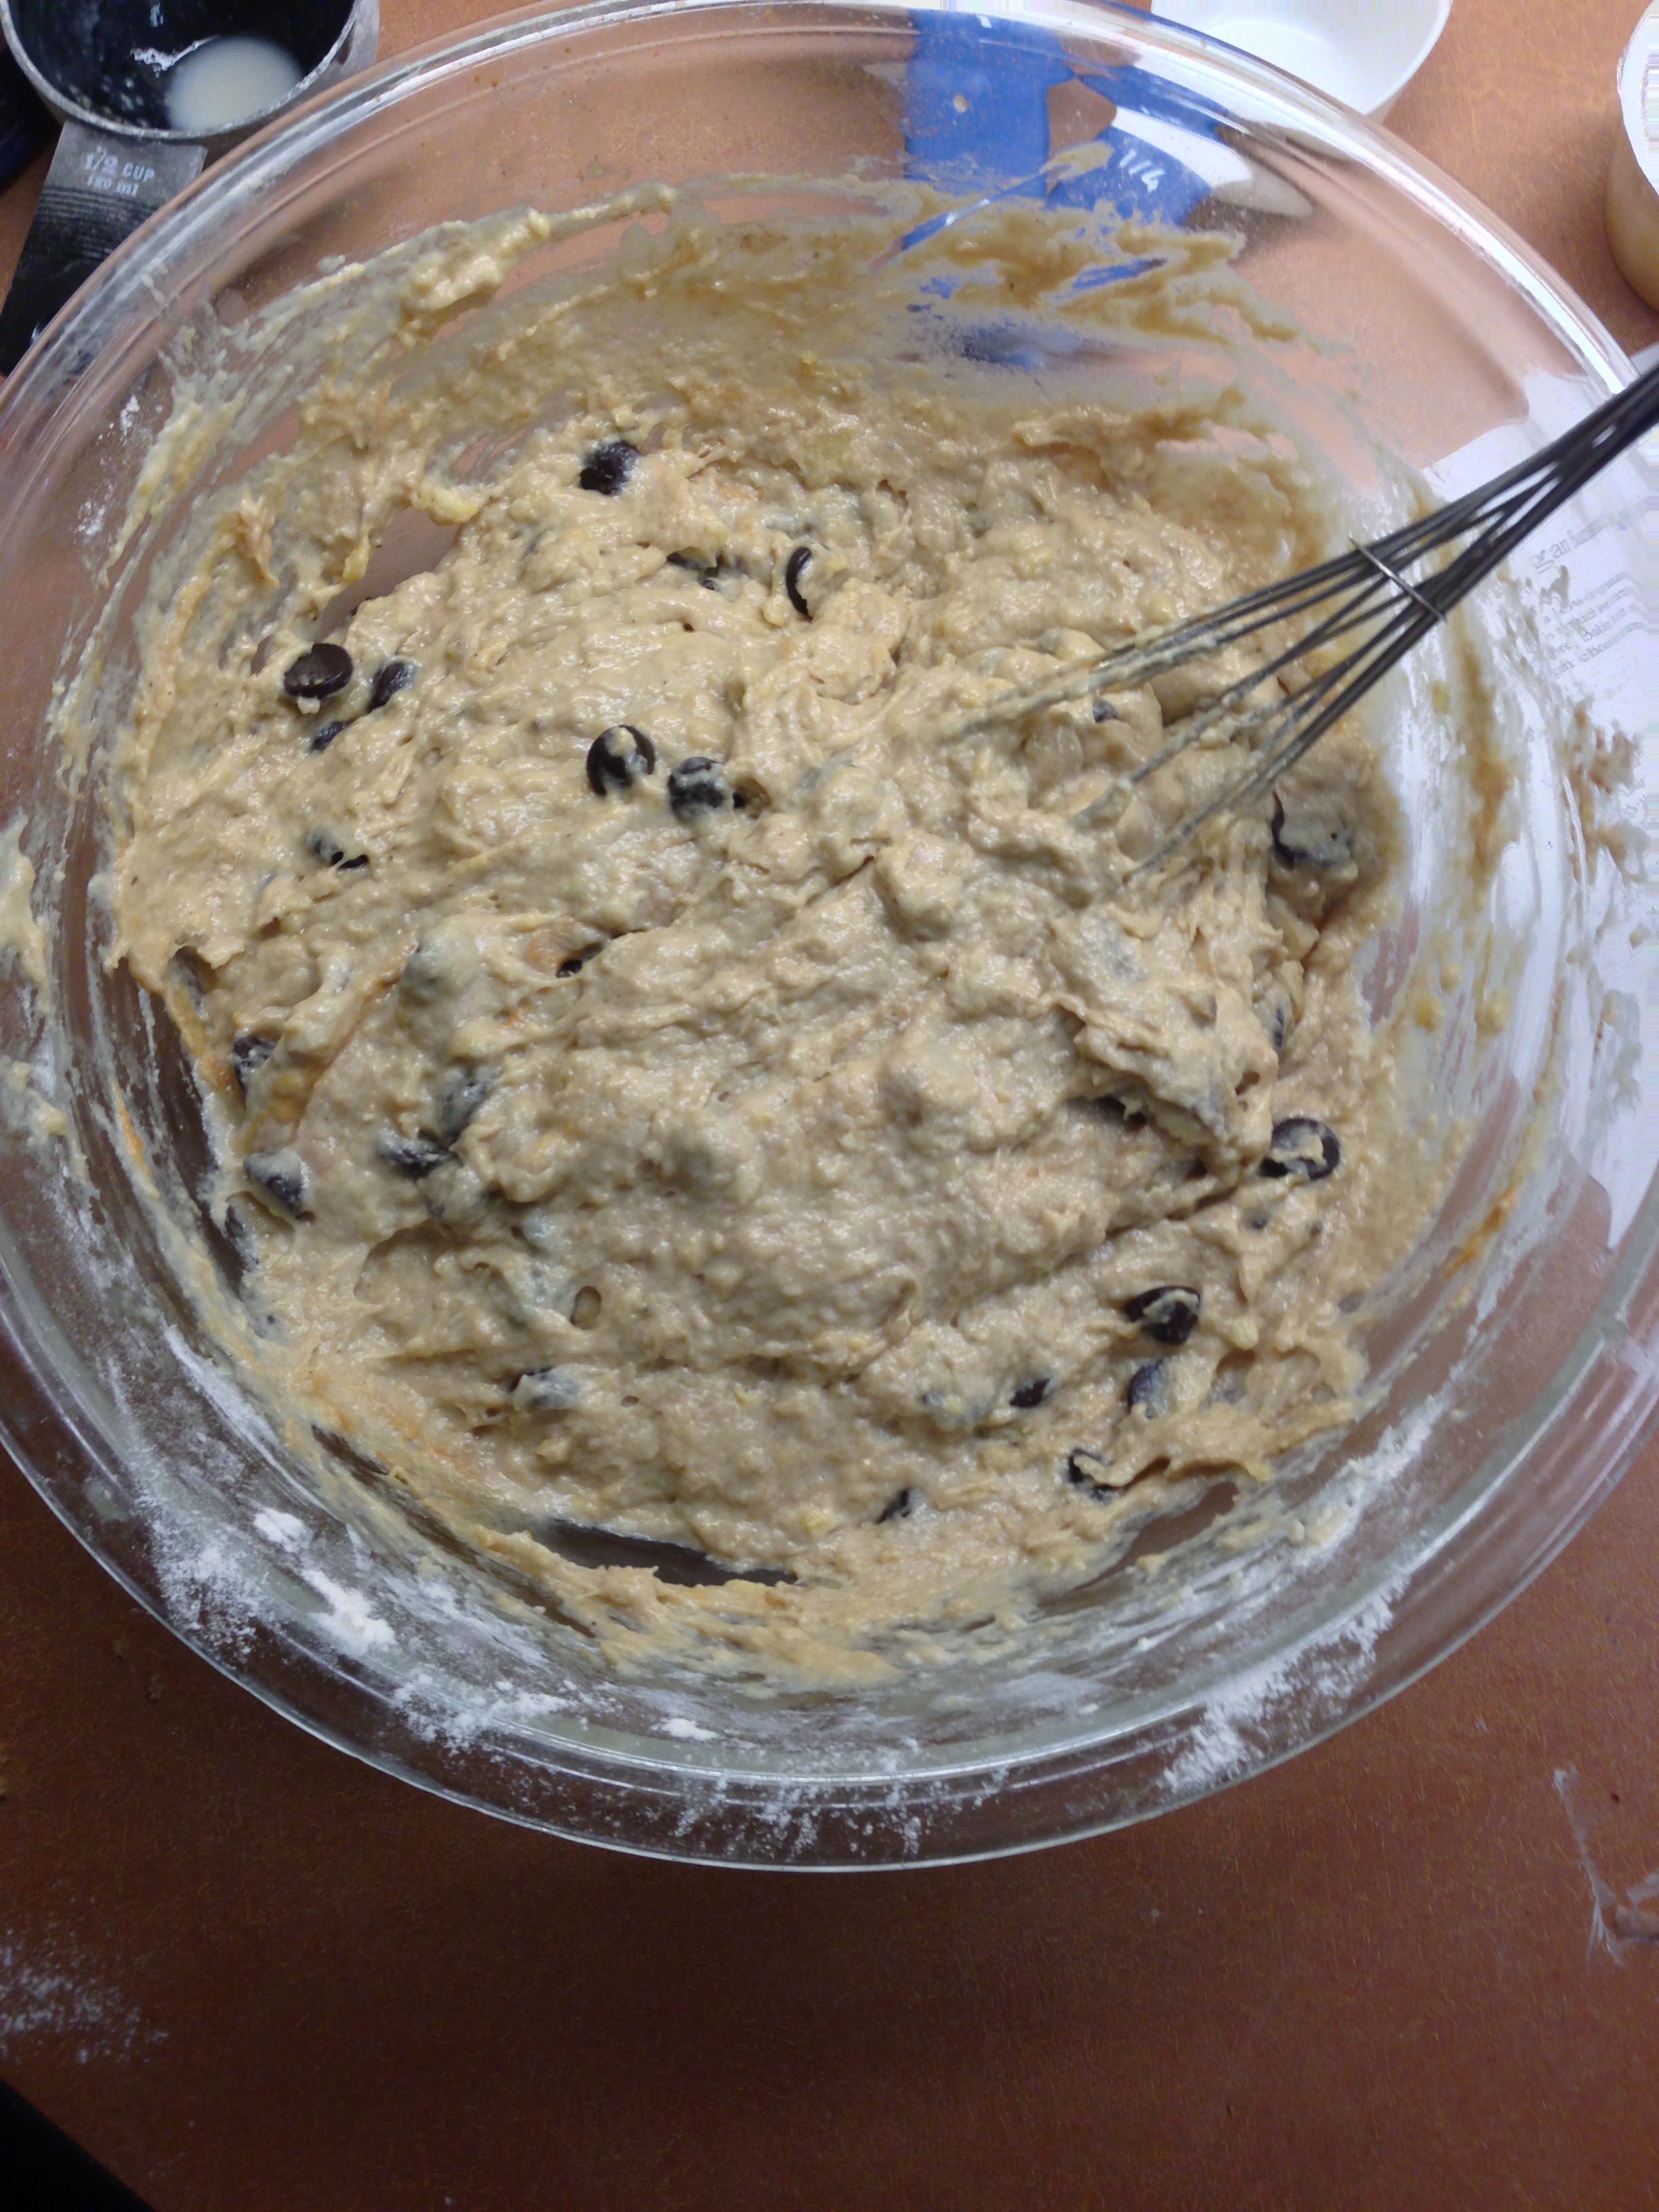
Unnecessary worrying, as usual. As soon as I had a taste of the batter (without any potential of contracting salmonella), I knew this was going to be a great loaf of bread.

I have a thing for peanut butter. It takes me less than a fortnight to finish a whole jar. I pile it onto bananas, toast, apples oatmeal, anything that would taste reasonably delicious with the addition of peanut paste. On particularly stressful days, I throw chocolate chips into a jar and spoon it out. Adding my favorite combination of dark chocolate and peanut butter to banana bread was a surefire way to make my favorite kind of sweet bread…even better.
This bread is scrumptious. Heavenly. Fantastic. Divine. Ambrosial (isn’t that a fantastic word?). Dessert-like, but actually healthy. Sort of like eating a peanut butter and chocolate sandwich…on banana bread. The sugar adds a spectacularly nice crunch (has anyone ever regretted topping anything sweet with sugar?). None of the flavors overpower the others; in fact, they accent one another beautifully.
This is the perfect marriage of banana, chocolate, and peanut butter, the paradigm of baking combinations. And you are invited to this celebration. A mostly guilt-free celebration, I might add: minimal butter, good fat from the olive oil, plenty of fruit, protein from the peanut butter and yogurt. Next time, I want to reduce the amount of granulated sugar – so feel free to use less sugar, more bananas, different kinds if chocolate chips…or more sugar. Whichever.
Because this was baked in a circular pan, the slices themselves looked more like scones than pieces of bread. There’s something more geometrically satisfying about eating a triangle over a rectangle or square.

I’m convinced that only the addition of walnuts or pecans could’ve made this yummier.
Oh, and more peanut butter.
Peanut Butter Dark Chocolate Chip Banana Bread
recipe adapted from Joy the Baker
(makes one loaf pan – could also use a round cake pan or muffin tin)
Ingredients
Directions
*NOTE: If your bananas aren’t ripe but you’re craving banana bread anyways, place them (skins still ON) on a baking sheet and stick them in a 350 degree F oven for about 45 minutes. The peels will turn black, but the inside will be ripe and sweet (and very easy to mash). Proceed with recipe.
PS: if you’re like me and express your affection for others by giving them food, this is a good recipe to whip up and send, or randomly show up on their doorstep with. It works, trust me.


